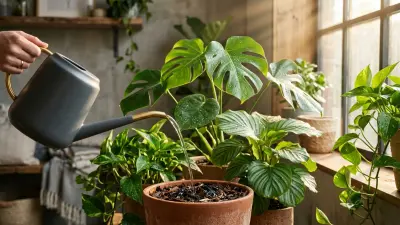
Quick answer: The most reliable way to water houseplants is by testing the soil rather than following a strict calendar. For most indoor species, wait until the top 2 inches (5 cm) of potting mix are dry to the touch, then saturate the soil thoroughly until water runs out of the drainage holes.
Why Calendar Schedules Fail Indoor Gardening
Setting an alarm to water your plants every Tuesday morning sounds organized, but it frequently leads to early plant failure. Indoor environmental conditions fluctuate constantly based on seasonal humidity, room temperature, and day length. A Monstera deliciosa resting near a south-facing window in July absorbs water at a radically higher rate than that same plant resting in dark winter conditions. Relying on a rigid schedule ignores these natural metabolic shifts, leading directly to chronic overwatering during winter dormancy or extreme underwatering during peak growth periods.
Your home's ambient microclimate dictates evaporation rates far more than time passing on a clock. Indoor humidity usually hovers between 30% and 50%, but running air conditioning or winter heat can drop indoor humidity levels below 20%. Higher temperatures between 68–77°F (20–25°C) paired with bright lighting levels—around 500 to 1,000 foot-candles (5,400–10,800 lux)—force plants to photosynthesize quickly, drawing up subterranean water rapidly. Conversely, low-light corners reading under 100 foot-candles slow transpiration to a crawl, leaving roots sitting in soggy potting mix for weeks if watered on an automated schedule.
Understanding soil dynamics is essential when learning proper houseplant care routines. Standard indoor potting soil typically consists of peat moss, coconut coir, perlite, and pine bark. Over time, peat moss breaks down and becomes hydrophobic, repelling water when completely dry and causing tap water to slide down the inside of the pot without ever hydrating the central root mass. By assessing the actual soil moisture rather than relying on the calendar, you ensure water reaches the roots exactly when the plant requires it.
Plant parent tip: If you notice yellowing lower leaves accompanied by soft, dark stems, you are almost certainly dealing with overwatering and early root rot. I always tell beginners to lift their pots before reaching for the watering can; learning the physical weight difference between a dry pot and a freshly watered one is the fastest way to avoid suffocating your roots.
How to Accurately Check Soil Moisture
Determining when to hydrate your plants requires zero guesswork once you implement a few basic diagnostic physical checks. The most immediate tool at your disposal is the simple finger test. Insert your index finger clean into the soil up to the second knuckle, roughly 2 inches (5 cm) deep. If the soil clings to your skin and feels cool and moist, hold off on watering. If your finger comes out clean and the mix feels dusty and warm, your plant is ready for a thorough drink.
For larger specimens in deep containers, such as a potted 6-foot Fiddle Leaf Fig (Ficus lyrata) or a mature Snake Plant (Sansevieria trifasciata 'Laurentii'), finger testing only evaluates the uppermost layer. This is where wooden chopsticks or analog moisture meters become invaluable. Slide a clean wooden chopstick down into the bottom third of the pot and leave it for ten seconds. Pulling it out reveals moisture levels much like testing a baked cake: damp soil will cling to the wood, whereas dry soil leaves the stick bare. If you opt for an electronic moisture meter, aim for a mid-range reading (level 3–4) before watering drought-tolerant plants, and water moisture-loving species like Calathea orbifolia when the gauge dips just below level 5.
Understanding specific watering thresholds across popular houseplant families ensures you maintain optimum root health without causing stress. The table below outlines specific parameters across popular indoor varieties:
| Plant Species | Ideal Soil Dryness Before Watering | Preferred Light Level (Foot-Candles / Lux) | Recommended Soil Mix Formula |
|---|---|---|---|
| Snake Plant (Sansevieria) | 100% dry (Entire pot) | Low to Bright Indirect (50–500 fc / 500–5,400 lux) | 50% Potting Mix + 30% Perlite + 20% Pumice |
| Monstera deliciosa | Top 50% dry (2–3 inches) | Bright Indirect (400–800 fc / 4,300–8,600 lux) | 50% Potting Mix + 30% Orchid Bark + 20% Perlite |
| Calathea Orbifolia | Top 25% dry (Top inch only) | Medium Indirect (100–300 fc / 1,000–3,200 lux) | 60% Peat/Coir Soil + 20% Perlite + 20% Worm Castings |
| ZZ Plant (Zamioculcas zamiifolia) | 100% dry (Entire pot) | Low to Bright Indirect (25–400 fc / 270–4,300 lux) | 40% Potting Mix + 40% Perlite + 20% Coarse Sand |
Top Watering vs. Bottom Watering Methods
Once you confirm your plant needs moisture, selecting the correct delivery method is key to maintaining structural root strength and preventing soil compaction. Top watering remains the standard approach: using a narrow-spout watering can, pour room-temperature water evenly across the entire surface of the soil until liquid drains freely from the bottom holes. This process flushes out built-in mineral salts and leftover synthetic fertilizer residue that can burn delicate root tips over time.
Bottom watering is an alternative technique that works well for root-bound plants, hydrophobic peat soil, or foliage sensitive to water droplet spots, such as African Violets (Saintpaulia). To bottom water, place your nursery pot directly into a basin filled with 1 to 2 inches of tepid water. Capillary action draws water upward through the drainage holes, saturating the root ball completely within 20 to 30 minutes. Once the top layer of soil feels slightly damp, remove the pot from the basin and let it drain thoroughly for 15 minutes before returning it to its decorative planter.
Regardless of which application method you choose, never allow your potted plants to sit continuously in standing saucer water. Allowing roots to remain submerged blocks oxygen access, creating an anaerobic environment where opportunistic pathogens like Pythium and Phytophthora fungi thrive. These organisms cause rapid decay of root tissue, leading directly to irreversible root rot. Always empty drainage trays within 20 minutes of watering to safeguard the underground system.
Proper hydration techniques work best alongside balanced feeding practices during active growth periods. When soil is moderately damp, applying a balanced 10-10-10 liquid fertilizer diluted to half-strength every four weeks from April through September supplies essential macro-nutrients. Applying fertilizer to dry, dehydrated soil can cause chemical root burns, making proper watering a necessary first step before feeding.
Preventing and Correcting Common Hydration Problems
Diagnosing plant distress early allows you to correct watering routines before structural tissue damage becomes permanent. Both underwatering and overwatering cause plants to drop foliage, but key visual cues reveal the underlying cause. Underwatered plants display dry, papery leaf tips, crisp curling margins, and lightweight pots. Overwatered plants develop soft, yellowing lower foliage, black spots near the leaf centers, persistent damp soil, and often attract small, dark flying insects known as fungus gnats (Bradysia species).
- Fungus Gnats: These pests breed in the damp top 1 inch of soil. Allow the potting mix to dry down further between waterings, apply beneficial nematodes, or dust the surface with pure diatomaceous earth to break their life cycle.
- Hydrophobic Soil Cracking: When high-peat soils dry out completely, they shrink away from pot walls. Bottom water the pot for 45 minutes to rehydrate the soil core fully.
- Edema (Water Blisters): Irregular watering spikes cause roots to take up water faster than leaf cells can process it, resulting in ruptured cell walls that form tiny raised bumps under the leaves.
- Mineral Crust Build-Up: White crusty deposits on terracotta pots or topsoil indicate hard tap water mineral buildup. Flush the pot with distilled or filtered rainwater every few months.
If you discover severe overwatering symptoms, act quickly to save the specimen. Remove the plant from its container and inspect the root system. Healthy roots are crisp and white or light tan; rotted roots appear soft, brown to black, and emit a foul smell. Trim away damaged root segments using sterilized pruning shears, dust remaining healthy roots with activated charcoal or cinnamon powder, and repot into a fresh, well-draining soil mix inside a pot with adequate drainage. For detailed repotting steps, visit our comprehensive guide on repotting houseplants safely.
Environmental adjustments also reduce hydration stress over winter months. Between November and February, when ambient light drops below 200 foot-candles in most indoor spaces, reduce watering frequency by roughly 50%. Always use room-temperature water around 68°F (20°C) rather than ice-cold tap water, which shocks tropical root systems adapted to equatorial climates.
Frequently Asked Questions
Can I use tap water directly on all my houseplants?
While hardy species like Pothos (Epipremnum aureum) handle tap water fine, sensitive species like Calathea, Maranta, and Spider Plants are sensitive to chlorine, fluoride, and dissolved minerals. Leaving tap water in an open pitcher for 24 hours lets chlorine evaporate, but filtering or using rainwater prevents brown leaf tips caused by fluoride.
Is it better to water houseplants in the morning or evening?
Morning is the best time to water houseplants. Early application gives the plant water right as daylight increases, boosting photosynthesis. It also allows extra surface water on leaves or topsoil to evaporate during the day, lowering fungal risk.
How do I know if my pot has adequate drainage?
A properly draining pot must feature at least one unobstructed hole at the bottom measuring at least 0.5 inches in diameter. If you are using cachepots (decorative pots without holes), keep your plant in its plastic nursery pot and lift it out while watering to drain completely before setting it back inside.
Your Immediate Action Plan for Healthy Plants
If you want to improve your plant care today, start by assessing your entire collection with a simple hands-on test. Pick up three of your pots to check their overall weight, and insert your finger into the top 2 inches of soil on each plant. Hold off on watering any plant that shows moisture beneath the surface, and give a deep, thorough soak to those that are completely dry. Updating your watering habit to rely on real physical checks rather than a fixed calendar schedule is the single best change you can make to help your plants thrive year-round.