
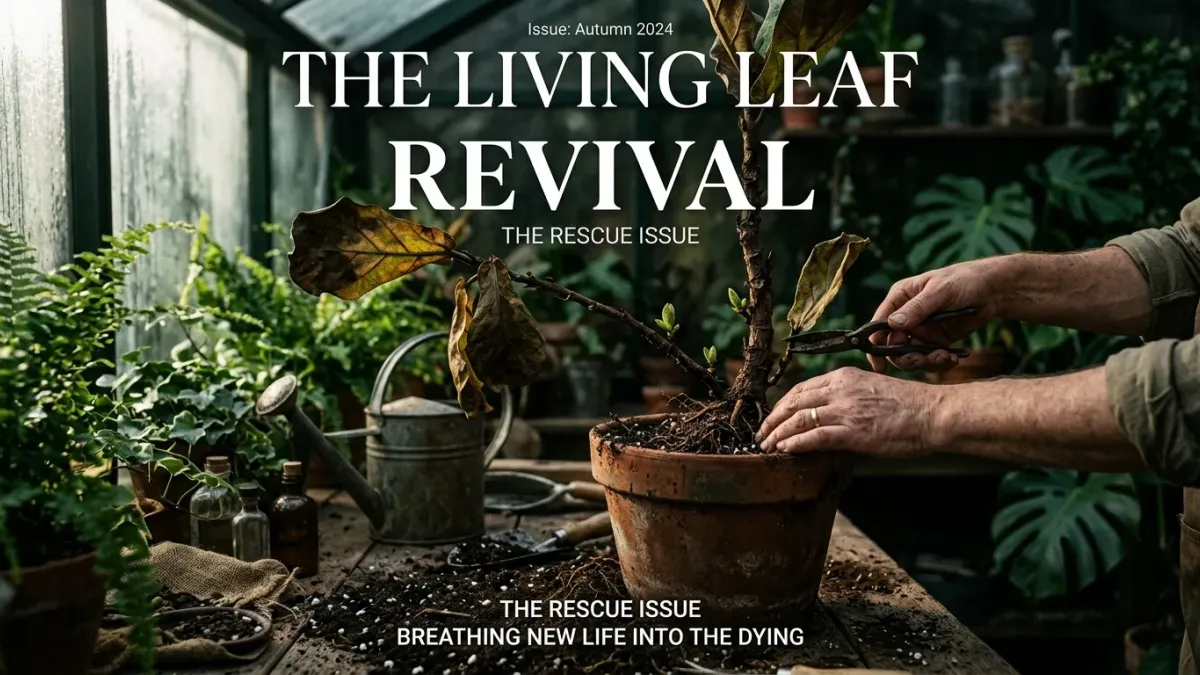
There's a silent threat lurking beneath the soil of many houseplants, often mistaken for thirst or nutrient deficiency: root rot. As an experienced urban horticulturist, I’ve seen countless plant parents, with the best intentions, accidentally send their leafy companions spiraling into this dreaded condition. But here’s the good news: root rot isn't always a death sentence. With the right knowledge and a bit of timely intervention, you can not only save your beloved plants but also equip yourself to prevent this common problem from ever striking again. Think of me as your plant's emergency room doctor and long-term wellness coach, here to guide you through every step.
At easyhouseplantcare.com, we believe that thriving indoor greenery shouldn't come with complicated routines. That's why we're diving deep into root rot – not just how to identify and treat it, but crucially, how to build a robust defense against its recurrence. We'll demystify why roots rot, how to spot the subtle cues your plant is giving you, and walk you through a clear, actionable recovery plan. Let's get those roots happy and healthy!
The Root of the Problem: Understanding Why Root Rot Strikes
Before we can fix root rot, we need to understand its origins. Root rot isn't a disease in itself, but rather a symptom of an unhealthy environment that allows destructive fungi and bacteria to thrive. The primary culprit? Lack of oxygen around the roots, almost always due to persistently waterlogged soil. When your plant sits in soggy soil for too long, the tiny air pockets essential for root respiration disappear. This creates an anaerobic (oxygen-deprived) environment.
Healthy roots need oxygen to perform vital functions like absorbing water and nutrients through a process called osmosis and active transport. When oxygen is scarce, these processes halt. The roots essentially "drown," becoming weakened and vulnerable. This anaerobic state also becomes a breeding ground for opportunistic pathogens – various fungi (like Pythium and Phytophthora) and bacteria – which then attack the compromised root tissue, causing it to decay. What was once a strong, functional root system turns into a mushy, ineffective mess.
Several factors contribute to this waterlogged scenario:
- Overwatering: The most common cause. Giving your plant too much water, too often, or letting it sit in standing water in a saucer.
- Poorly Draining Soil: Heavy, dense potting mixes that retain too much moisture and don't allow water to flow through freely.
- Incorrect Pot Size or Type: A pot that's too large for the plant holds excess soil, which stays wet longer. Pots without drainage holes are also a guaranteed recipe for disaster.
- Environmental Conditions: Low light, cool temperatures, and high humidity slow down the plant's metabolism and rate of water uptake, meaning the soil takes longer to dry out.
Decoding the Distress: Early Signs of Root Rot & Confirmation
Root rot is notoriously sneaky because its initial symptoms often mimic other common houseplant problems, like underwatering or nutrient deficiencies. This can lead plant parents to make the fatal mistake of adding *more* water. As your trusted plant parent, I’ll help you differentiate these signals.
Above-Ground Clues: What Your Plant is Telling You
Your plant's foliage is often the first place to show distress, even if the problem originates below the soil line. Look for a combination of these signs:
- General Lack of Vigor: Your plant just looks "off" – dull, tired, not growing as it should.
- Yellowing Leaves: Often starting with older, lower leaves, they may turn a sickly yellow and then brown, becoming limp before dropping off. This can look similar to nutrient deficiency, but with root rot, the leaves often feel soft or mushy.
- Wilting or Drooping Foliage (with moist soil): This is the most deceptive sign! Your plant looks thirsty, its leaves drooping dramatically, but when you check the soil with your finger or a moisture meter, it's still very damp, or even soaked. The rotting roots can't absorb water, so the plant is essentially dehydrating despite sitting in water.
- Stunted or Slowed Growth: If your plant suddenly stops producing new leaves, or any new growth is noticeably small and weak, root health is likely compromised.
- Soft, Mushy Stems or Base: For plants with thicker stems (like a Monstera deliciosa or a Fiddle Leaf Fig), the rot can spread upwards, causing the stem near the soil line to feel soft and squishy. This is an advanced stage and requires immediate attention.
- Foul Odor: Sometimes, a distinct, unpleasant smell – like decaying organic matter or rotten eggs – will emanate from the soil. This is a strong indicator of root decomposition.
Specific Example: Imagine your usually vibrant Calathea orbifolia, known for its stunning striped leaves, suddenly has its leaves curling inwards and drooping, looking utterly miserable. You watered it just two days ago, and the soil still feels quite wet. This is a classic root rot scenario. If it were truly underwatered, the soil would be bone dry, and the leaves might feel crispy.
Below-Ground Confirmation: The Unmistakable Signs
The only way to definitively confirm root rot is to inspect the roots themselves. This step is crucial before attempting any treatment.
- Gently Remove the Plant: Lay the pot on its side. For flexible plastic pots, gently squeeze the sides and pull the plant out by the base of the stem. For rigid terracotta or ceramic pots, you may need to run a thin knife around the rim to loosen the soil ball. Support the plant's base as you lift it out.
- Examine the Root Ball: Gently shake off excess soil to expose the roots.
- Healthy vs. Rotten:
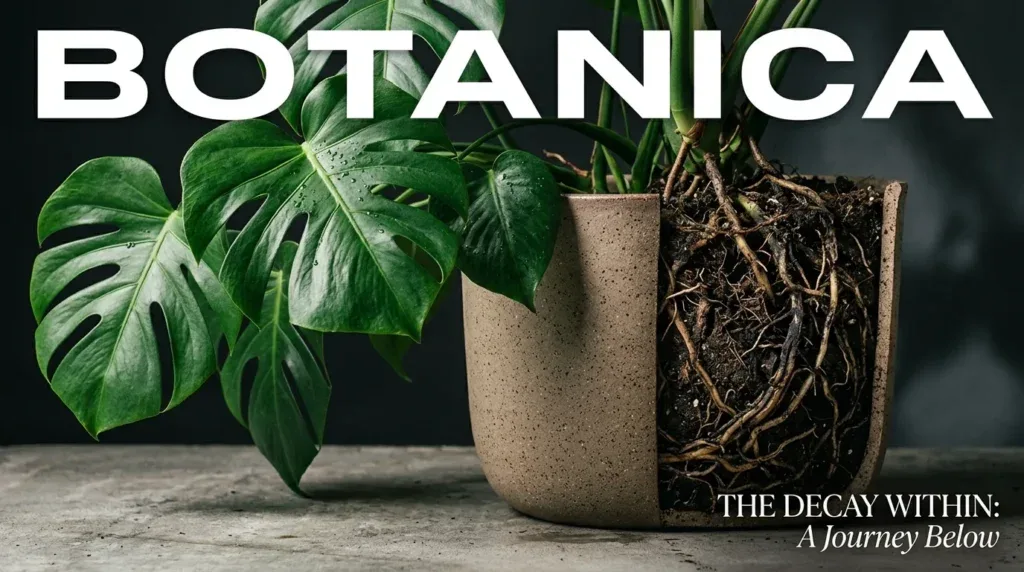
- Healthy Roots: Will be firm, pliable, and typically light in color (white, tan, or sometimes orange/red depending on the plant, like a ZZ Plant). They will have a fresh, earthy smell.
- Rotten Roots: Will appear dark brown or black, feel soft and mushy to the touch, and often disintegrate easily when handled. They usually emit a distinct, foul, decaying odor. You might see entire sections that are slimy or completely disintegrated.
If you confirm the presence of rotten roots, it's time for emergency intervention.
Emergency Rescue Mission: Immediate Steps to Save Your Plant
Once you've confirmed root rot, swift and decisive action is your plant's best chance at survival. Think of this as delicate plant surgery.
- Prepare Your Tools: You'll need a very clean, sharp pair of scissors or pruning shears. Sterilize them thoroughly before and after use with rubbing alcohol or a 10% bleach solution to prevent the spread of pathogens. Have some fresh, well-draining potting mix ready, along with a clean pot of the appropriate size.
- Rinse the Root Ball: Gently wash off all the old soil from the roots under lukewarm running water. This helps remove lingering pathogens and allows for a clearer view of the damage. Be very gentle to avoid further stress to the healthy roots.
- Surgical Removal of Damaged Roots: Using your sterilized shears, carefully cut away all affected roots. This means anything that is mushy, black, brown, slimy, or smells foul. Don't be afraid to be aggressive here; it's far better to remove too much rotten material than to leave some behind, as the rot can quickly spread. Trim back to firm, healthy, light-colored tissue. If you're left with very few roots, that's okay – a small, healthy root system is better than a large, decaying one.
- Trim Excess Foliage (If Necessary): If you've removed a significant portion of the root system (more than 30-40%), it's highly recommended to also trim back some of the plant's foliage. This reduces the plant's water and nutrient demands, balancing it with its now-smaller root system. Remove yellowed or heavily damaged leaves first, and if needed, prune back some healthy stems to reduce overall leaf mass. Aim for approximately the same percentage of foliage removal as root removal.
- Repot into Fresh, Well-Draining Soil:
- Pot Choice: Choose a clean pot that is roughly the same size as the original, or even slightly smaller if you removed a lot of roots. Ensure it has ample drainage holes. Terracotta pots are excellent for plants prone to root rot as they allow the soil to breathe and dry out faster.
- Soil Mix: Use a fresh, highly aerated, and well-draining potting mix. A good general recipe for most houseplants is 50% high-quality indoor potting mix, 30% perlite or pumice for drainage, and 20% orchid bark or coco coir for aeration. For succulents or cacti, increase the perlite/pumice to 50-60%.
- Repotting: Place a small layer of fresh soil at the bottom of the pot. Center your plant, spreading its remaining roots gently. Fill the pot with the new soil mix, gently tamping it down to remove large air pockets, but avoid compacting it too much. Leave about an inch of space from the rim.
- Initial Watering & Placement: After repotting, give the plant a light watering. Don't drench it; just enough to settle the soil around the roots. Place the recovering plant in a spot with bright, indirect light and stable temperatures. Avoid direct sun, which can stress it further, and steer clear of cold drafts.

The Road to Recovery: Post-Treatment Care & Rebuilding Healthy Roots
The immediate surgery is just the first step. The real recovery happens in the weeks and months following. Your goal now is to encourage new, healthy root growth and help your plant regain its strength.
- Watering Wisely: This is critical. For the next few weeks, err on the side of underwatering rather than overwatering. Allow the top 2-3 inches of soil to dry out completely before watering again. Use the finger test: stick your finger deep into the soil. If it feels dry, it's time to water. If it's still damp, wait. A moisture meter can be a helpful tool here.
- Humidity & Environment: Provide consistent, moderate humidity if your plant prefers it (most tropicals do). A pebble tray or a nearby humidifier can help. Keep the plant away from extreme temperature fluctuations, such as vents or open windows.
- Patience, Patience, Patience: Root recovery is a slow process. Don't expect immediate improvements in foliage. It might take weeks or even months for your plant to show significant new growth. Resist the urge to fertilize too early.
- Introducing Root Stimulator (Optional): After about 2-3 weeks, once the plant has had a chance to settle, you can introduce a very diluted (half-strength) root stimulant or a mild, balanced liquid fertilizer with a higher phosphorus content (e.g., 1-2-1 or 2-4-2 ratio). This can encourage new root development. Only apply during the active growing season (spring/summer).
- Monitor Closely: Regularly check the plant for any signs of worsening symptoms or new issues. Look for new, healthy growth – this is your strongest indicator of recovery.
Example of Recovery: I once rescued a large Bird of Paradise that had severe root rot. After trimming away nearly 70% of its root ball and half its leaves, I repotted it in a gritty aroid mix. For two months, it looked sad, but I stuck to a strict "dry-out" watering schedule. Slowly, tiny new leaves emerged, and after about four months, it was putting out strong, healthy growth again. It requires careful attention, but it's incredibly rewarding.
Future-Proofing Your Foliage: Preventing Root Rot for Good
The best defense against root rot is a good offense. By understanding the common pitfalls, you can create an environment where your houseplants thrive and root rot becomes a distant memory.
Mastering the Art of Watering
- Water When Necessary, Not on a Schedule: Forget rigid schedules. Always check the soil moisture before watering. For most tropical houseplants, wait until the top 1-2 inches of soil are dry. For succulents and cacti, allow the soil to dry out almost completely.
- Water Thoroughly: When you do water, water until it drains out of the bottom of the pot. This ensures the entire root ball is hydrated. Discard any excess water from the saucer after 15-20 minutes.
- Consider Bottom Watering: For some plants, especially those in terracotta or with dense foliage, bottom watering can be effective. Place the pot in a tray of water and let it absorb moisture through the drainage holes for 20-30 minutes, then remove.
Optimizing Potting Mix & Drainage
- Use a High-Quality, Well-Draining Mix: Invest in a specialized indoor potting mix. For most plants, amend it with ingredients like perlite, pumice, orchid bark, or coarse sand to improve drainage and aeration. Avoid heavy garden soil.
- The Right Pot, Every Time:
- Drainage Holes are Non-Negotiable: Never use a pot without drainage holes unless you are confident in creating a proper cachepot system with a well-draining inner pot.
- Material Matters: Terracotta pots are excellent for plants prone to root rot because they are porous and allow moisture to evaporate from the sides, promoting faster drying. Plastic pots retain moisture longer.
- Size It Right: Don't overpot! A pot that is too large holds too much soil, which stays wet for extended periods. Repot only when your plant is visibly root-bound, usually into a pot only 1-2 inches larger in diameter.
Environmental Control
- Adequate Light: Plants in brighter light photosynthesize more efficiently and use water faster. Ensure your plant is getting the appropriate amount of light for its species. A low-light plant in bright light will dry out faster, but a high-light plant in low light will struggle to use water, increasing root rot risk.
- Temperature & Airflow: Keep your plants in stable, appropriate temperatures. Cooler temperatures slow metabolic processes, reducing water uptake. Good air circulation around your plants can also help surface soil dry faster.
Common Mistakes to Avoid
- Watering on a Fixed Schedule: Each plant's water needs change with the season, light, temperature, and growth rate. Always check the soil.
- Ignoring Drainage Holes: Thinking a layer of pebbles at the bottom of a pot without drainage will prevent root rot is a myth. It just raises the water table, creating a smaller zone of wet soil.
- Using Heavy Garden Soil: Outdoor soil is too dense for indoor pots and can compact quickly, suffocating roots.
- Fertilizing a Stressed Plant: Never fertilize a plant that is sick or actively recovering from root rot. Wait until it shows signs of healthy new growth.
- Panicking and Over-Trimming: While aggressive trimming of *rotten* roots is necessary, don't trim healthy roots out of fear.
Root rot might seem intimidating, but with the right knowledge and a confident approach, you can turn a struggling plant into a thriving one. Remember, every plant challenge is an opportunity to learn and grow as a plant parent. You've got this!
Quick "What to Do This Week" Takeaway
- Daily: Briefly observe your plants for any wilting or yellowing.
- Weekly: Check the soil moisture of all your plants using your finger or a moisture meter before watering. Empty drainage saucers promptly after watering.
- Monthly: Inspect plant pots for signs of compacted soil or slow drainage. Consider amending your soil mixes for better aeration if you've had root rot issues.
- Seasonally: Adjust your watering frequency with the seasons – less in winter, more in summer. Repot root-bound plants into appropriately sized pots with fresh, well-draining soil during the growing season.